3D Silicone Nail Mold: Pro-Level Charms at Home
Make salon-quality 3D charms with a flexible silicone mold—step-by-step guidance for flawless embossed designs using gels, resin, or acrylic.
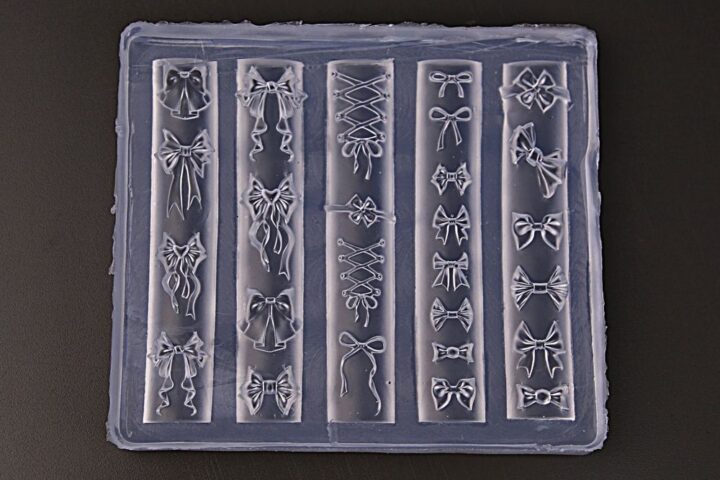
Want to add salon-grade 3D charms to your manicures without sculpting by hand? A soft, clear silicone mold turns detailed floral, bow, and lace patterns into repeatable embossed pieces in minutes. With the right materials and a few technique tweaks, you can achieve consistent, professional-looking results at home or in the salon.
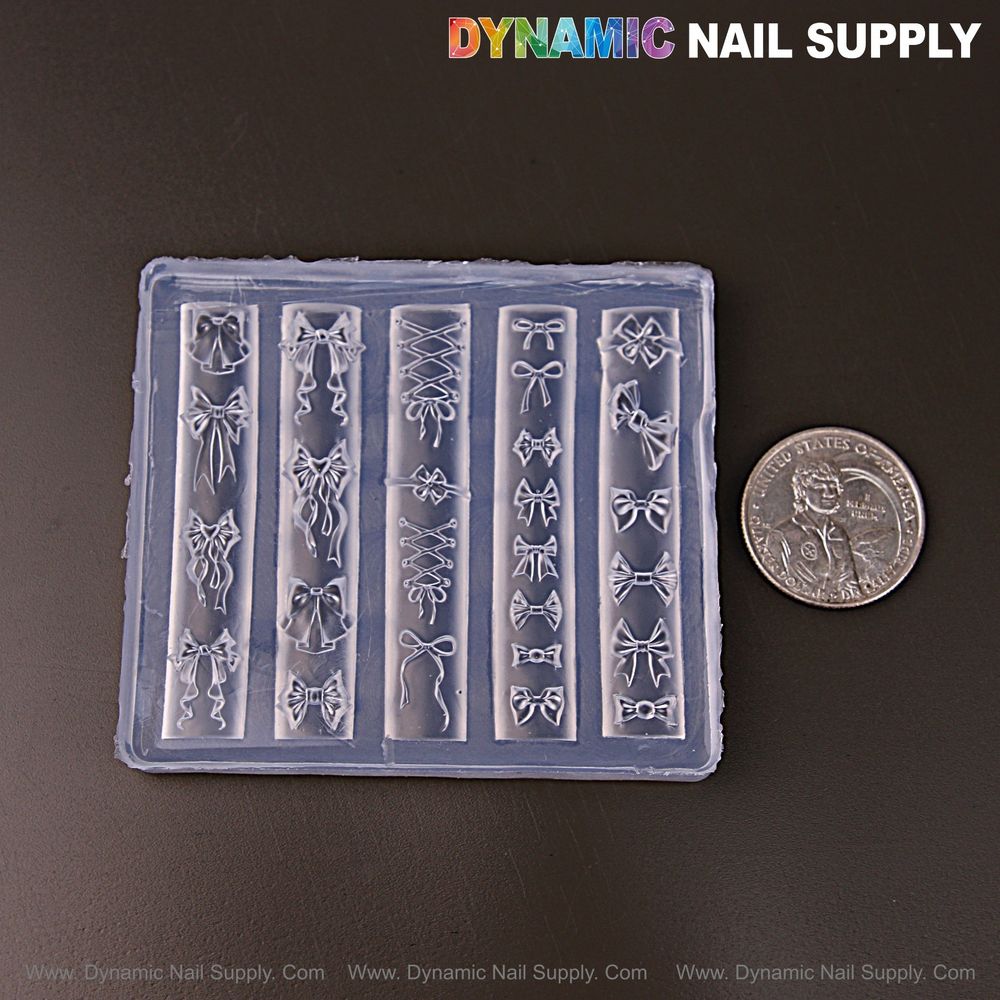
Before you start, keep one mold close at hand for practice and experimentation; this silicone charm mold will help you build a starter collection of shapes and sizes to mix and match on different nail lengths and styles.
Why choose a 3D silicone nail mold?
Silicone molds are elastic, washable, and reusable, so they’re ideal for producing many identical charms quickly. Their flexibility makes demolding delicate pieces simple, and the clear material helps you see fill coverage as you work. These molds accept a range of nail materials—sculpting gel, solid gel, gel polish, acrylic, and UV resin—so you can tailor the finish and durability of each charm.
Step-by-step: create crisp embossed nail charms
Follow this reliable workflow to get clean, detailed results every time.
- Prep the mold: Clean the silicone with alcohol, a nail cleanser, or use adhesive tape to lift dust. Ensure the mold is dry before filling.
- Fill the cavity: Deposit a small amount of your chosen material into the mold. Use a dotting tool or carving pen for tiny crevices to avoid air pockets.
- Level the surface: Hold a scraper or card at about a 45° angle and gently remove excess, leaving the design perfectly defined.
- Cure appropriately: Cure under a UV/LED lamp—start with the manufacturer guidance; the common range is about 30–60 seconds depending on product thickness.
- Demold carefully: Flex the mold from the edges and lift the charm using tweezers to avoid stretching or tearing fragile details.
- Attach to the nail: Position the charm on the nail bed or over sculpted acrylic/gel, secure with gel glue or builder gel, and finish by sealing the edges with a top coat and curing 60–90 seconds.
Key features in practical use
Understanding the mold’s attributes helps you exploit them for better outcomes:
- Soft premium silicone: High elasticity protects fine details during removal and reduces breakage of tiny petals or bow loops.
- Ultra-thin profile: Easier handling and closer fit against scrapers and tools, which aids in achieving crisp edges.
- Multi-material compatibility: Use gels for flexible charms, acrylic for rigid ornaments, or UV resin for glossy, hard finishes—choose based on the look and longevity you need.
- Washable and reusable: Rinse and dry between uses to prevent contamination and preserve pattern clarity over many sessions.
Pro tips for flawless miniature details
- Work in a well-lit area and use a magnifying lamp for tiny motifs—seeing the fill depth avoids underfilled cavities.
- For multi-colored charms, cure thin color layers separately to maintain separation and prevent bleeding.
- Add micro pigments, chrome powders, or fine glitter before final cure for coordinated effects; seal with a thin top coat afterward.
- When using resin, avoid overfilling—resin can pool differently than gel and may need more time to level before curing.
- Store molds flat and away from direct sunlight to preserve flexibility and prevent warping.
Who benefits most from these molds?
These silicone molds are designed for a wide range of users: nail technicians looking to speed up repetitive decoration, independent creators building a signature style, and at-home nail artists who want salon-level 3D accents without hand-sculpting. They’re also handy for crafters making phone-case decor, resin jewelry, or scrapbook embellishments.
Care, safety, and best practices
- Clean the mold before each use to avoid trapped dust or cured residue affecting detail.
- Gently flex to demold; pulling directly risks stretching fine features or tearing the silicone.
- Keep away from sharp tools that can cut the silicone surface.
- If you switch between materials, wash thoroughly and dry the mold completely to prevent cross-contamination.
What’s included and value notes
Each purchase delivers one clear silicone 3D nail art mold ready to use. Optional accessories like carving pens, tweezers, or silicone brushes can speed workflow but are sold separately. This mold is priced at $4.99 and makes an affordable addition to a professional kit or a DIY starter pack; prices may change.
Conclusion: add consistent 3D detail with less effort
Using a soft, detailed silicone mold lets you replicate complex embossed charms quickly and reliably. With basic tools, mindful handling, and the step-by-step approach above, you can produce salon-quality 3D accents for natural nails, tips, or press-on sets—boosting creativity and saving time on every service.